Search This Blog

Thursday 21 February 2013

Eventing Framework In Microsoft Dynamics AX 2012 Part 2

Now In this Post I will guide you how to create Events.

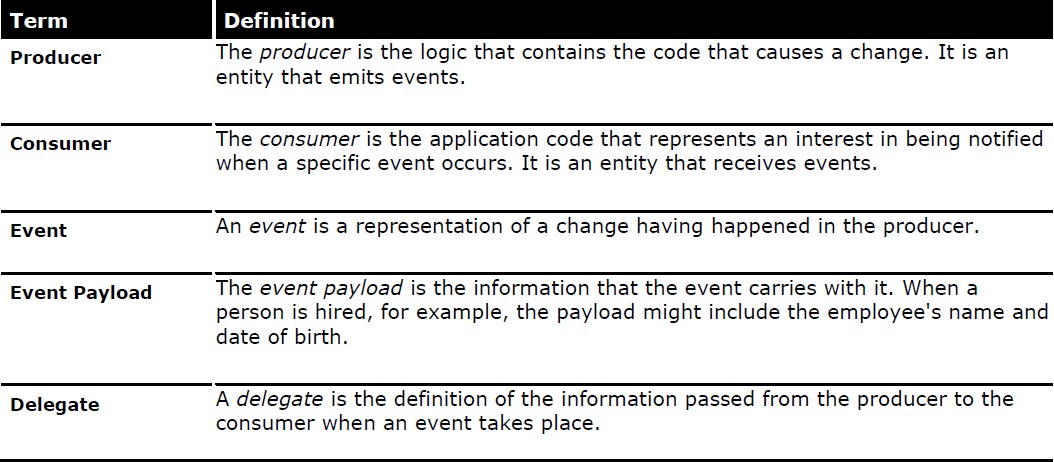
We have basically already discuss that what events are.Now In Microsoft Dynamics AX two terminologies are used these are.

1.Pre Events.

2.Post Events.

Pre Events are those that called before the method and post events are those that are called after the method.

Now I will show you the Scenario I can we use Pre and Post Events.

Below are the some steps for creating and using the events.

Step 1:

First we will create the simple table with two fields i.e  as you can see this in the image below.

 Step 2:

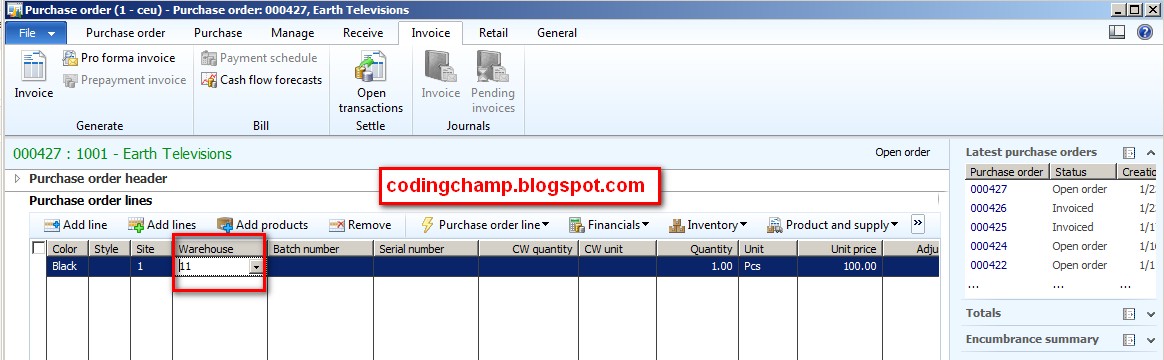
Now we will create the SimpleListDetail Form

As you already know how to create a form.

Now after creating the SimpleListDetailsForm drag the table that we have created earlier on the datasource node of that SimpleListDetailForm.and from datasource drag the fields to the details header and grid node of the design node.

As you can see in the image below.


Run that form it should be exactly like below form.


Step 3:

Now will create a method on the table i,e assignned to to this form.The is validatewrite method and before and after that method we will create events.What I am trying to say is one event will fire before the execution of that method and one event will fire after the execution of that methods.

First we will create the method as you can see in the image  below


Step 4:

After Creating the method we will assign pre and post events to it.

Just right click the method and than select the new event handler subcription.

As you can see in the below image.


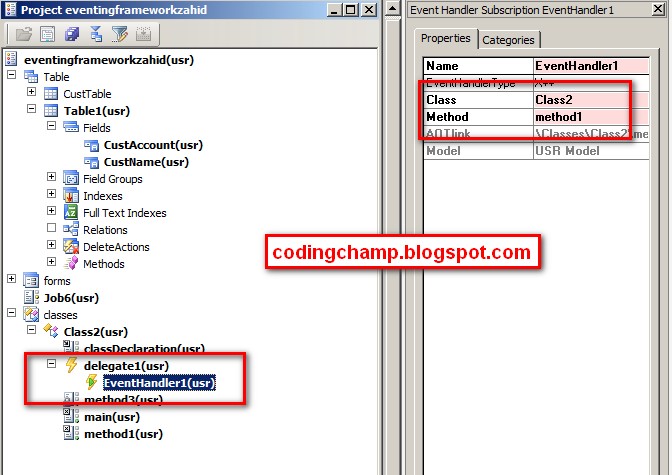
Now when you create the new event handler just go into the properties of the that eventhandler and than set the properties to the " Called When" =  Pre and than "Class name" = name of the class and "method" = name of the method that will be called before the execution of that method.

As you can see in the image below.


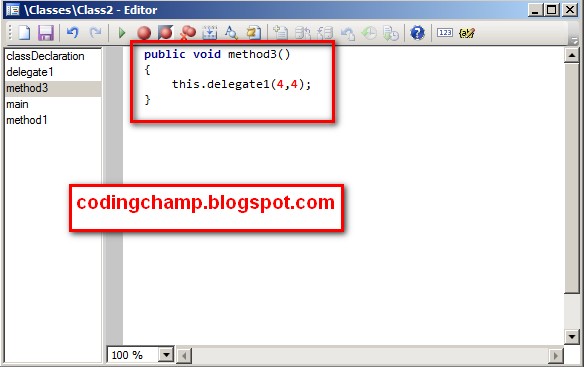
Now inside the zahidpre method I am just showing the message inside the info box that the pre method is called.

Now its quit easy to create this event handler method i.e zahidpre.

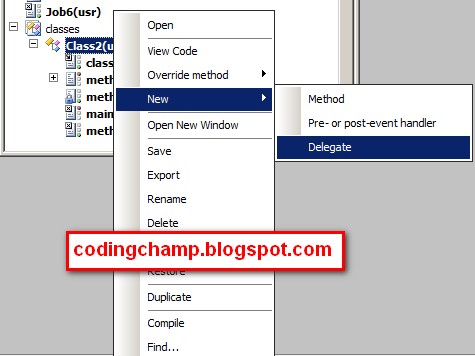
Just right click the class and than select new->pre-post-eventhandler.

As you can see in the image below.


An Event Handler will be created as you can see in the image below.


Now repeat the step 4 for the Post Event Handler.Only one thing you should do is when creating the Eventhandler on table just set its property "called when" = Post.

As you can see in the image below.


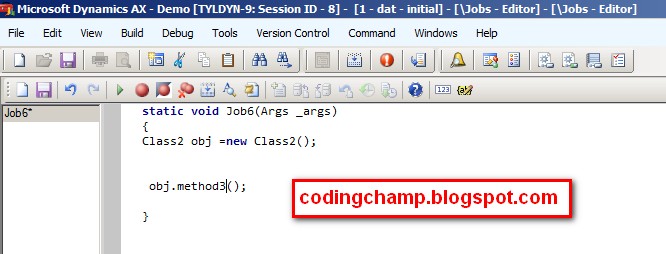
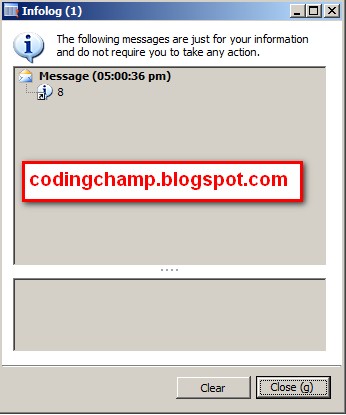
Now I will show you the demo that how pre and post event handlers are run when we run the form.

As you already know that inside the pre event handler I am showing the info message that "Pre is called" and same thing for the post event handler that I am showing that the "Post is called" and inside the validate write method I am showing that the "This called form the validate write method".

Now I will run the form and than insert the record and during the insertion of the record first pre event  will be call and than the validate method will be call and than the post event will be called.

 As you can see in the above form that I have inserted the record  and when I click the new button or close the form the data that I have write will going to insert into the record and that pre event will call and than the validate write method will call and than post event will call.

As you can see the messages of the info box inside the below image.


Now This was all related to the Event Framework part.

I hope you like that post.If you guys have any issues than feel free to comment or contact me :) :)

If you want to go to eventing framework part 1 post than click on the link below.

Eventing Framework Part 1

Thanks

Muhammad Zahid.

Tuesday 19 February 2013

Eventing Framework In Microsoft Dynamics AX 2012 Part 1

The two basic concepts are use in eventing framework.These are:

1.Delegates

2.Events.

Delegates and Events:


Delegates are just basicallly methods pointers they are  use to hold the refrence of methods.When we call these delegates the methods subcribe to this delegate automatically execute.

Note : we can assign more than one method to the single delegate.

Now the main purpose of delegate is use in the event driven programming.

Events are use when we want want to execute certain block of code on certain event like on button click etc.

Below is the image that will more show the concept of delegates and events


Below are some links that will elaborate more about Delegates and events.

http://www.codeproject.com/Articles/11541/The-Simplest-C-Events-Example-Imaginable

http://www.akadia.com/services/dotnet_delegates_and_events.html

We modeled the concept of events in Microsoft Dynamics AX 2012 on .NET eventing concepts.

The following table lists the terms in Microsoft Dynamics AX 2012 related to events.

Now I will show the demo of implementation of the Delegates and Events in Microsoft Dynamics AX.

Delegates In Microsoft Dynamics AX:

Below are the following  steps for creating Delegates and than calling them in microsoft dynamics AX 2012

First create a class and than right click on that class and than select new  ->  delegate as you can see in the below image.


Now your delegate is created successfully now add the parameters into it as you can see in the below image.


Now we need to subcribe a  method to this delegate this is because when we call this delegate the subcribe method will automatically called.

Note:we can subcribe more than one methods to the single delegate.

For subcribing methods we first need to create our method.
As I have already created as you can see in the below image.


In the above method you can see that I am adding the two numbers that I have send in the parameter and than I am going to print it.

Note:All the methods that are subcribe to delegate should have the same parameters and return type as of delagate have.

 Now I will subcribe this method to the delegate.

Now right click the delegate and than select the new event handler subcription as you can see in the below image.


Now we will subcribe our delegate to this event handler.

Just right click the event handler and select properties and than enter the
class name and its method name as you can see in the below image.


Now as you can see in the above image.I have subscribe the method 1 in to the delegate 1.

Now in the next step we will call this delegate.Now as you know that delegate can not be called outside the class so what I did  is I make method called method3 and than inside that method I am going to call the delegate and than from job I will call the method3.

You can see the method3 in the below image.


Now I will create a  job and than call this method as you can see in the image below.


Now I will show you the output in the below image.


This was all in the eventing framewoerk part 1.In the next part I will show you the detail about events in AX.


I hope you like this post

thanks Muhammad Zahid.

Wednesday 23 January 2013

Creating Purchase Order and Invoice In Microsft Dynamics AX 2012

In the previous post we have created the product and than released that product.Now in this post we will create the purchase order of that Product and than we will create the Inoice of that product.

Below are the step for Creating Purchase Order and Invoice.

Step 1:

Just go to the Account Payable ->Purchase Orders -> All Purchase Orders

A new window will come as you can see in the below image.Then press the New Purchase Order from the action pane.


When you click the Purchase Order button the new window will come as you can see in the image below where you have to select the vendor account and than press ok.


After pressing the ok button A new form will appear where you have to select the product its quantity and price etc as you can see in the image below.


when you select the item from the above screen than an exception will create as you can see in the below image.


This issue is because we have not selected the Dimension Group while creating the product.
Now go to the  Product information management -> Common -> Released products

A new form will open as you can see in the below image.


Now select the product and than click the edit button and than select the storage dimension group,tracking dimension group and the item model group and item group as you can see in the below image.


Now after selecting these dimensions close the form and than again go to the purchase order form and than select the product as you can see in the below image.

Note: Item group option is not shown in the above image as we also have to select it.This option is in the manage cost fast tab of the above form.


Now  go to the purchase tab and press the confirm button as you can see in the above image to confirm the purchase order.It will take some time to confirm the purchase order.

Now in the next step we will create the invoice against the purchase order  click the invoice tab on the same form and than click the invoice button from the action pane as you can see in the below image.


When you click the invoice button a new form will open where you have to give the invoice number and than invoice date and and than click the post button from the action pane .A wizard will open than again you have to click the post button from the action pane.As you can see  in the image below.


 While Posting the invoice this below issue may accur i.e


The above issue is because of we have not selected the warehouse while creating the purchase order.

Again go to the warehouse form and than select the warehouse field as you can see in the below image.


Now again generate invoice of that purchase order and than post the warning will no more generaete and invoice will successfully posted.

Now our Invoicing is completed.Now I will show this product i.e 14th street pizza in our in hand inventory.

just go to the Inventory and warehouse management -> Inquiry -> On hand inventory

A new form will open where you can see the inhand inventory


This was all from my side.Thanks for visiting my blog :) :)

Thanks

Muhammad Zahid.

Wednesday 16 January 2013

Creating New Product and than releasing that product in Microsoft Dynamics AX 2012

In this Post I will show you the demo on how can we create new Product in Microsoft Dynamics AX 2012 and than Create Different Variations against that product (What Variations are I will discuss latter).and that I release that Product and than I will create Purchase Order against that product and than confirm that purchase order and than Create Invoice against that purchase order and than I will show that product in on hand inventory.

Below are the steps we need to perform that  I have discussed above:

Step 1:

First of all we have to create the new product.

Just go to the Product Information Management -> Common -> Products -> All Products and Product Masters.

A new form will  open containing all the existing products and than Click the new product button in the Action Pane as you can see on the below image.


When you click the button.A new form will open for product Creation as you can see in the below image.


Now as you can see in the second field of the above image i.e the product subtype.There are to types of product subtypes One is Product that I have selected in the above image and the other one is product master.

The main difference between product and product master is that the product has not dimension for example there is a product like a cup of glass.This glass is of only single type like it does not have any diffrent types of colour or different types sizes so in such a case when we are creating a product in which there is not more than one properties of the product are available than we select product subtype = Product and in such cases in which we are having diffrent types of the same product than we select the product subtype = Product Master.

Now when we select the product subtype = Product Master than there are more fields become visible as you can see in the below image.


The field product dimension group as you can see in the above image is the dimensions of the product like if I am creating a table than the table may be of different colours and of different sizes so  these colours and  sizes are the dimensions of the table we can make our own dimensions as well.Just right click the dimension group field and than click view details as I have shown in above image.Now the new form will open as you can see in the below image where you can create your own dimensions.


In the above form you can create your own dimension also.As I am using the PG_4 this means that my product have different dimension,size,colour.

Now after selection of product dimention group in the product creation form.Press the ok button your product will be created successfully.

Now click the product dimension button as you can see in the below image.


A new form will open where you have to set the dimensions.You can see the example in the image below.


Now close that form and than click Product Variants as you can see in the below image.


A new form will open where you have to select the variant suggestions.This will make different types of the product based on the product dimension that you have made earlier.You can see below the image of the form.


Now click on the variant suggestions button.A new form will open as you can see in the below image.


Now select all these variations and then click create.

Now Variations will be created and than appeared on your product variant form.Now click on the Release Product Button in the Action Pane.

As you can see in the below image also.


A new Form will open as you can see in the below image.Click the select companies button and than select the company and than press the ok button.


After you press the ok button a new window will come as you can see on the image below than again press the ok button.It will take some time to release that product.


Now your product is released.You can also check it just go to the
Product information management -> Common -> Released products.

This was all for creating new product and Releasing that product in Microsoft Dynamics AX.

In the next post i will show you how to create purchase order of that product and than Create Invoice of that product and than check that product in our inhand inventory.

Thanks

Muhammad Zahid. 

Thursday 10 January 2013

How to increase the Budget of particular dimension line in Microsoft Dynamics AX 2012

Some times  the error message shown that the budget assined against this dimension is exceeded this from the allocated.

To remove this issue we have to increase the budget against the dimension line.

just go to the budgeting ->Common -> Budget Register Entries ->All Budget Register Entries.

And than select the register entry for which you want to increase the budget and than click the Edit Button.

As you can see in the below image.


Now when you click the edit button a new form will open as you can see in the below iamge.
In that form you can see the budget amount that I have already highlighted below.You have to just increase that amount and than close that form.


After closing that form your warning will no more come.Until your expense exceeded that updated amount.

Thanks

Muhammad Zahid.

Thursday 3 January 2013

AIF Framework In Dynamics AX 2012 Part 2

In the Last Session i,e in the Part 1 I have guide you on how to configure the AIF Service.Now in this session I will guide you on how to Consume the AIF service.

Below are some steps to consume the AIF service:

Step 1:

 First of all I will create the Console Application in dot net c#.And than add the refrence of our AIF service that we have created in the part 1.

After creating your project just go to the solution explorer and than right click service refrences and than click add service refrence as you can see in the below image.


Now when you click the add service refrence a new wizard will open on which you have to past the WSDL URL that we have got during the making of the inbound port.

You can see the screen shot of that port in the below image.


Now press the ok button.IT will make the refrence of the service.
 
Step 2:
 
 Now in the next step i will show you the code snippet.

First of all we have to add the name spaces i.e

using project.servicename;

in my case it is:

using zahidemp.zahidempServiceRefrence1;

using System.Diagnostics;

Now i have to define the company name in which i am going to perform the insert update delete operation.

Callcontext context = new CallContext { Company = "dat"};

EntityKey[] keys = null;

In will tell you inside the code that why i have use that EntityKey.

Now I am going to show you the code snippet for the adding the data in to the ax table.

Axdgetemp1 empinfo = new Axdgetemp1();


/**Creating the Data ***/
 
Console.WriteLine("Inserting the record");

List<AxdEntity_employee_1> emplist=new List<AxdEntity_employee_1>();

AxdEntity_employee_1 zahid=new AxdEntity_employee_1();

zahid.EmpNo=1;

zahid.EmpNoSpecified =
true;

zahid.Dob="28-5-1989";

zahid.Empname = "Muhammad Zahid";

AxdEntity_employee_1 asim=new AxdEntity_employee_1();

asim.EmpNo = 2;

asim.EmpNoSpecified =
true;

asim.Empname ="Muhammad Asim";

asim.Dob="19-5-1955";

emplist.Add(zahid);

emplist.Add(asim);


empinfo.employee_1 = emplist.ToArray();


keys = client.create(context,empinfo);

Console.WriteLine("Records inserted successfully");
Console.ReadKey();


What I did in the above code is.I have just made the object of my query i,e empinfo and than
 and than made the list in which i will add the employee names and than make the object of one employee i.e zahid and the object of another employee i,e Asim and than i have assign the values in these objects and than added them into the list and than added that list to the object of Query and than we have call the create method of our proxy class that inserted that data.

Now when the data is inserted successfully it will return the Recid of the record which we are going to save it into the keys object that i have created earlier in the code which I told that I will inform you inside the code.

Now the data is inserted successfuly I am going to show you the screen shot of the record inside the table that i have inserted.


 Step 3:

Now I will show you the demo about how can we comsume the service in update operation.

below is the code snippet for the update operation.

Console.WriteLine("Updating the record"); 
List<CriteriaElement> criterialist = new List<CriteriaElement>();

CriteriaElement criteria = new CriteriaElement();

criteria.DataSourceName = "employee_1"; 
criteria.FieldName = "EmpNo"; 
criteria.Operator = Operator.Equal; 
criteria.Value1 = "1"; 
criterialist.Add(criteria);QueryCriteria querycriteria = new QueryCriteria();

querycriteria.CriteriaElement = criterialist.ToArray();

keys = client.findKeys(context,querycriteria);

empinfo = client.read(context, keys);

zahid = empinfo.employee_1[0];

zahid.Empname = "Zahid";
 

List<AxdEntity_empdepartment_1> departmentlist = new List<AxdEntity_empdepartment_1>();


AxdEntity_empdepartment_1 empdepartment =new AxdEntity_empdepartment_1();

empdepartment.Empdepartment = "Dynamics Core";
empdepartment.Experience = 1;

departmentlist.Add(empdepartment);

zahid.empdepartment_1 = departmentlist.ToArray();

client.update(context, keys, empinfo)
Console.WriteLine("Data Updated successfully");

Console.ReadKey();

In the above code i have just made the criteria on bahalf of which i am going to get the record and than updating that record and than there is another table empdepartment related to the table emp.I am also inserting the record in that table.

Note:There is the relation between emp table and emp department table.

Step 4:

Now I will show you the demo on how can we consume the service in delete operation.

//for delete

criterialist =new List<CriteriaElement>();

criteria =new CriteriaElement();
criteria.DataSourceName = "employee_1";

criteria.FieldName = "EmpNo";

criteria.Operator =Operator.Equal;
criteria.Value1 = "1";

criterialist.Add(criteria);

querycriteria =
new QueryCriteria();

querycriteria.CriteriaElement = criterialist.ToArray();

keys = client.findKeys(context, querycriteria);
Debug.Assert(keys.Length == 1);

client.delete(context, keys);

Now I will show you the demo on how can we consume the service in delete operations.In the above code I have just created the criteris as I did earlier in the update operation and than deleted the record based on that criteria.

Now that was all in the AIF Framework part 2.I have shown all the examples of Insert,Update and Delete Operations through AIF Service.

There is the link below if you want  to go the AIF Framework Part 1.

AIF Framework Part 1

Thanks

Muhammad Zahid.