Implementing Workflows in Microsoft Dynamics AX 2012:
WorkFlow:
Workflow is basically a business process that defines how a document flows through the system.
Technical Components:
1. Categories.
2. Types.
3. Approvals.
4. Event Handlers.
Categories:
Categories basically defines in which module workflows can be use.
Types:
Basically types are the templates which shows the options when we create the workflow.Workflow types contains the Approvals and task.Each approval and task have the different node in the AOT.
Approval:
Approval is basically the task on which we have to assign this task to someone who has to approve or reject the document.
Event Handlers:
When you generate your workflow type or workflow task there are classes added to your project on which events are created in which you write your logic to insert record into some tables based on your event.
For example when the workflow approver approves the document than the approve event is fire and when the owner of the document submits the record than the event is fire and many more events fire based on the action of the user.In these events we can write our custome logic if we want.
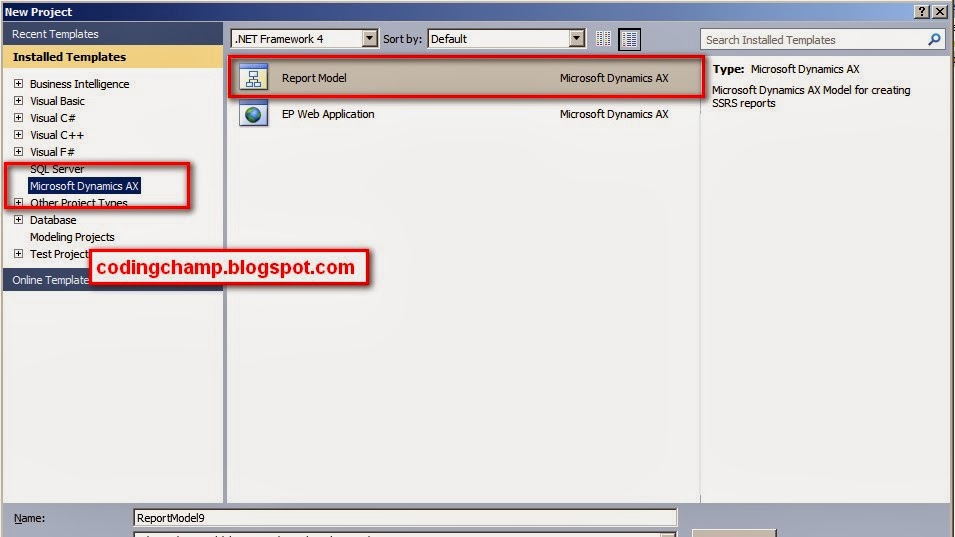
Implementing A Workflow:
First of all just go to the AOT and than select the workflow -> workflowtypes and than right click and than select the workflow type wizard
As you can see this in the below image:

A new wizard will open as you can see this in the below image.
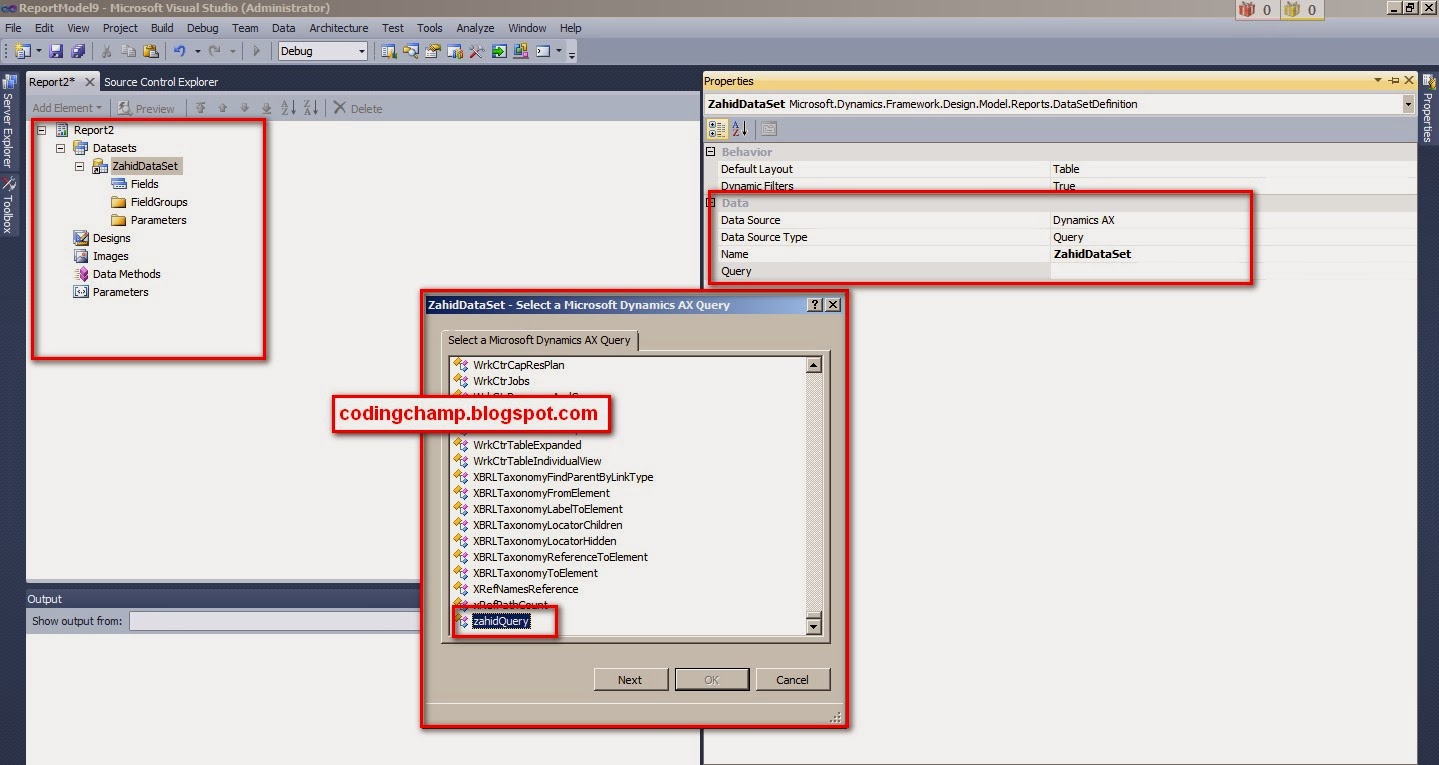
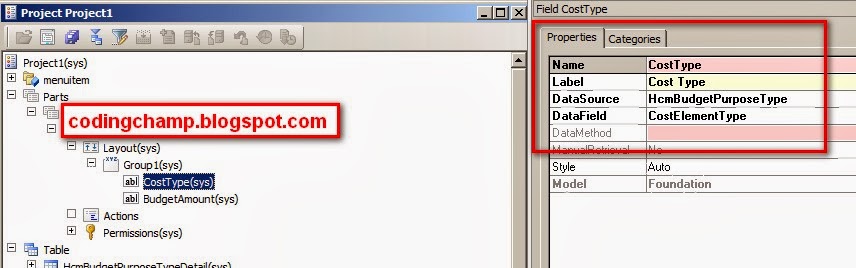
One thing you have to do before creating the workflow type is you have to create the query first and then menu item of the document i,e your form.
Query is basically for the table which manages actions of your document i.e approve by for example if the document is for the requisition than purchase requisition id.
You can check the existing purch req table and the query named purchreqdocument for the purchase requisition module for verification.

As you can see in the below image i have put the name of the workflowtype and the query name and the document menuitem name.
If you want to run this workflow on the EP than you can also specify the web menuitem.
You can generate the workflow type for rich client or web client or both.
you can see the options in the above image.
Now click next button you will see all the names of the classes menuitems that will be generate as you can see in the below image.

After clicking the finish button the wizard will generate the workflowtype project.
As you can see this in the below image.
note:Its mandatory to generate incremental CIL after the generation of the workflow type.

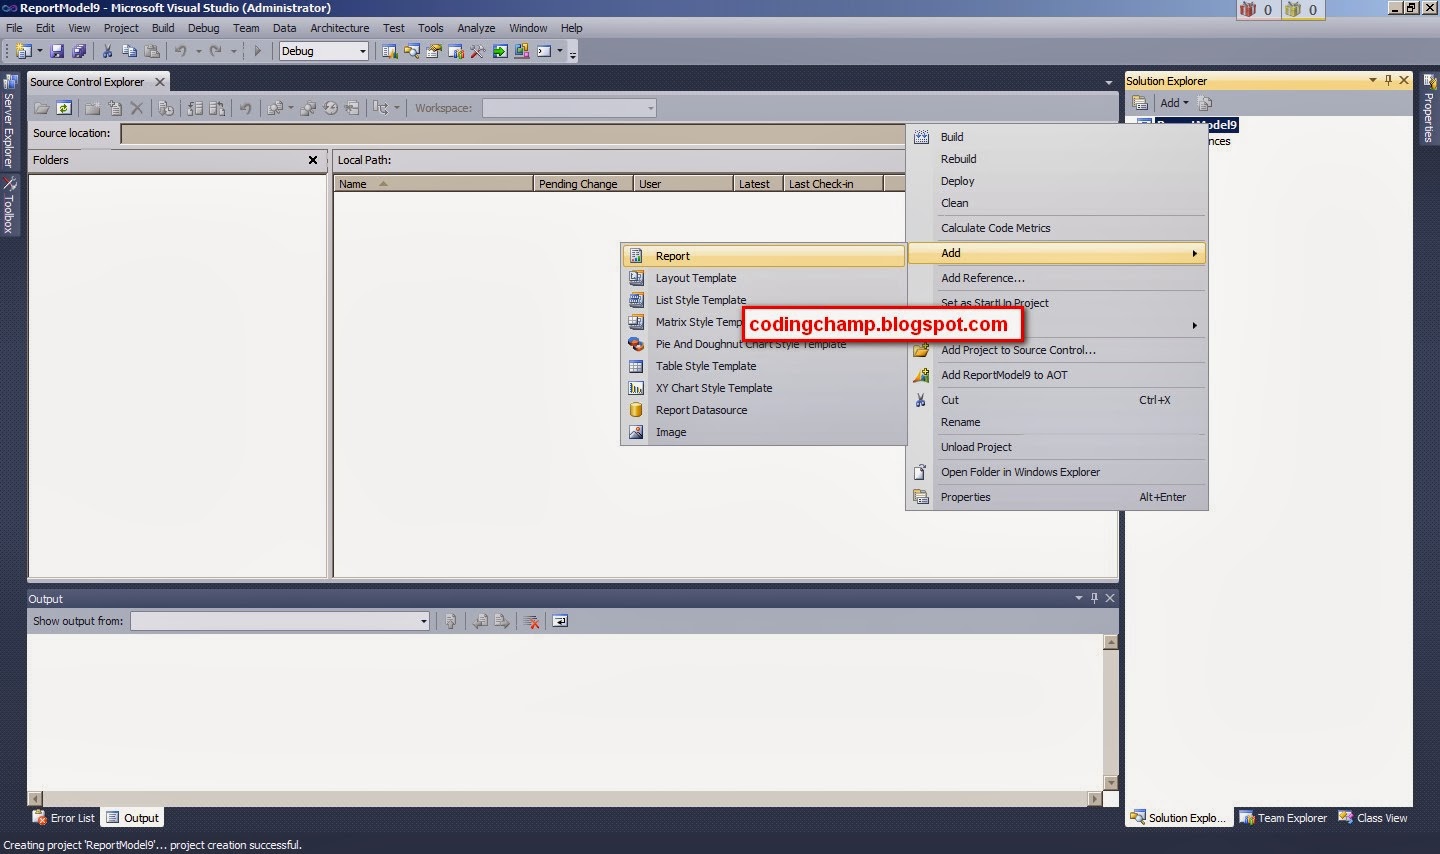
Now we need to create the Workflow Task.
To do this just go to the task node and than right click Add-in and than select the task wizard.
you can see this in the below image.

A wizard will open exactly as we did before for the workflow type.
You can see this in the below image.

As you can see in the above image that all the fields are same as we did for the workflow type except few ones.
Workflow document is basically the name of the workflow type that we created earlier.
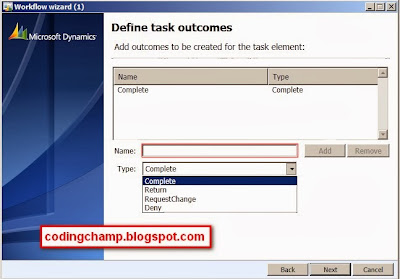
Now click next.You will see the new screen on which you have to create the task.
These tasks are basically the tasks that workflow app rover have to do like approve i.e complete the workflow or reject the workflow or request to change the app rover of the workflow.
You can see this in the below image.
Now click next and you will see all the classes that will be going to generate and than click the finish button your project related to the workflow task will be created.
As you can see this in the below image.
Note: Dont forget to generate the incremental CIL after creation of the project

Now we need to create the Work Flow Approval
Just go to the approval node and than right click -> addsin -> approval wizard
as you can see this in the below image.

Now wizard will open where you have to do the all the same steps as you did earlier for the creation of the workflow tasks.
note: don't forget to generate the incrimental CIL after the creation of the project.
After the creation of the workflow approval.Now put the workflow approval and workflow tasks to the supported elements of the workflow type.
As you can see this in the below image.

One more thing you have to do is to write the logic for the initialization of the workflow.Like when the submit button is clicked the workflow should get started.
You can see the exisiting purchreqworkflow class for the purchase requisition workflow.
Basically there is an action type menuitem PurchReqSubmitToWorkflow on which class named PurchReqWorkflow is set.when the user submits the document this menuitem (i.e submit button) is clicked and this class is called which initiates the workflow.
There are lot more events available on which you can write your own custom code.
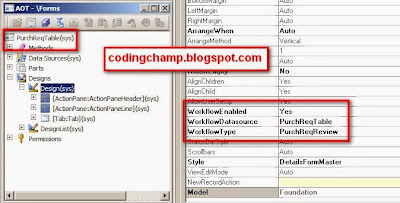
One more thing you have to do while implementing your workflow is that.You have to set the name of your workflow type and the workflow datasource on the property of the form otherwise your workflow will not be going to work.
For example you can see the existing form of the purchase requisition i.e PurchReqTable.
you can see that in the below image.
There is one more thing you have to do in your workflow that thing is that there will be the table which manages the states of the document in that table you have to write the method submit to workflow and in that method you have to
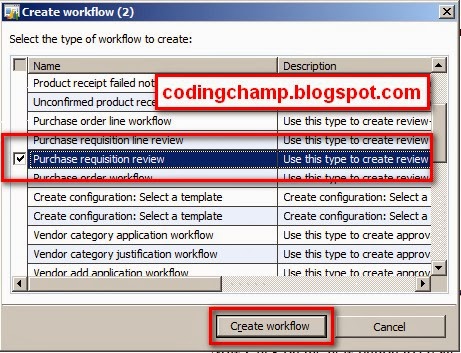
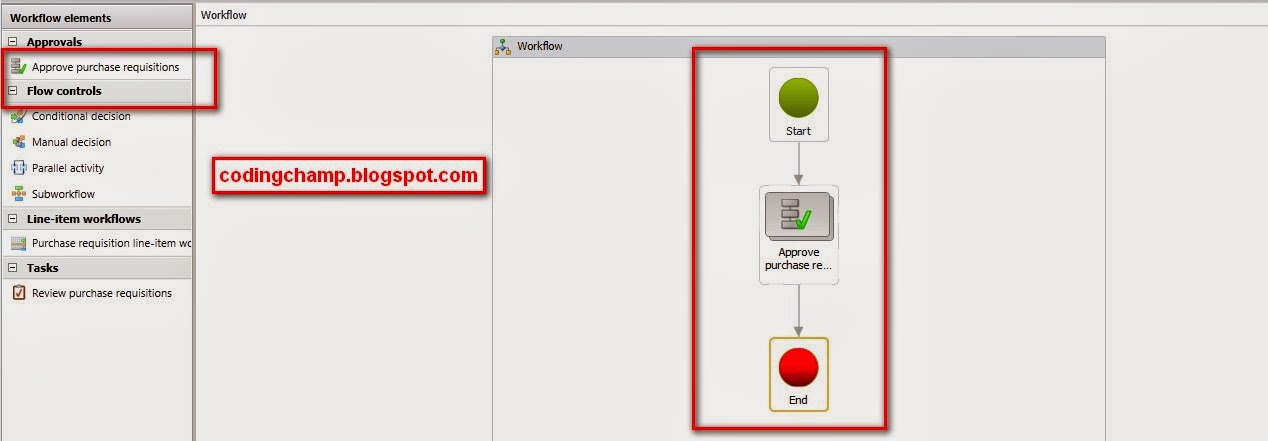
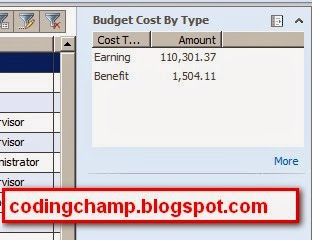
Now i will show you our newly created workflow on the client side which we can configure and use.
As I have created my workflow for the procurement and sourcing model.
I just go to the CEU/Procurement and sourcing/Setup/Procurement and sourcing workflows.
And than create new workflow you can see your newly created workflow in it.
You can see this in the below image.


In the above image you can see our newly created workflow.
This was all from my side related to the implementation of the workflows.
In the next post i will show you on how can we use this workflow on client side.
Thanks
Muhammad Zahid
WorkFlow:
Workflow is basically a business process that defines how a document flows through the system.
Technical Components:
1. Categories.
2. Types.
3. Approvals.
4. Event Handlers.
Categories:
Categories basically defines in which module workflows can be use.
Types:
Basically types are the templates which shows the options when we create the workflow.Workflow types contains the Approvals and task.Each approval and task have the different node in the AOT.
Approval:
Approval is basically the task on which we have to assign this task to someone who has to approve or reject the document.
Event Handlers:
When you generate your workflow type or workflow task there are classes added to your project on which events are created in which you write your logic to insert record into some tables based on your event.
For example when the workflow approver approves the document than the approve event is fire and when the owner of the document submits the record than the event is fire and many more events fire based on the action of the user.In these events we can write our custome logic if we want.
Implementing A Workflow:
First of all just go to the AOT and than select the workflow -> workflowtypes and than right click and than select the workflow type wizard
As you can see this in the below image:

A new wizard will open as you can see this in the below image.
One thing you have to do before creating the workflow type is you have to create the query first and then menu item of the document i,e your form.
Query is basically for the table which manages actions of your document i.e approve by for example if the document is for the requisition than purchase requisition id.
You can check the existing purch req table and the query named purchreqdocument for the purchase requisition module for verification.

As you can see in the below image i have put the name of the workflowtype and the query name and the document menuitem name.
If you want to run this workflow on the EP than you can also specify the web menuitem.
You can generate the workflow type for rich client or web client or both.
you can see the options in the above image.
Now click next button you will see all the names of the classes menuitems that will be generate as you can see in the below image.

After clicking the finish button the wizard will generate the workflowtype project.
As you can see this in the below image.
note:Its mandatory to generate incremental CIL after the generation of the workflow type.

Now we need to create the Workflow Task.
To do this just go to the task node and than right click Add-in and than select the task wizard.
you can see this in the below image.

A wizard will open exactly as we did before for the workflow type.
You can see this in the below image.

As you can see in the above image that all the fields are same as we did for the workflow type except few ones.
Workflow document is basically the name of the workflow type that we created earlier.
Now click next.You will see the new screen on which you have to create the task.
These tasks are basically the tasks that workflow app rover have to do like approve i.e complete the workflow or reject the workflow or request to change the app rover of the workflow.
You can see this in the below image.

Now click next and you will see all the classes that will be going to generate and than click the finish button your project related to the workflow task will be created.
As you can see this in the below image.
Note: Dont forget to generate the incremental CIL after creation of the project

Now we need to create the Work Flow Approval
Just go to the approval node and than right click -> addsin -> approval wizard
as you can see this in the below image.

Now wizard will open where you have to do the all the same steps as you did earlier for the creation of the workflow tasks.
note: don't forget to generate the incrimental CIL after the creation of the project.
After the creation of the workflow approval.Now put the workflow approval and workflow tasks to the supported elements of the workflow type.
As you can see this in the below image.

One more thing you have to do is to write the logic for the initialization of the workflow.Like when the submit button is clicked the workflow should get started.
You can see the exisiting purchreqworkflow class for the purchase requisition workflow.
Basically there is an action type menuitem PurchReqSubmitToWorkflow on which class named PurchReqWorkflow is set.when the user submits the document this menuitem (i.e submit button) is clicked and this class is called which initiates the workflow.
There are lot more events available on which you can write your own custom code.
One more thing you have to do while implementing your workflow is that.You have to set the name of your workflow type and the workflow datasource on the property of the form otherwise your workflow will not be going to work.
For example you can see the existing form of the purchase requisition i.e PurchReqTable.
you can see that in the below image.

There is one more thing you have to do in your workflow that thing is that there will be the table which manages the states of the document in that table you have to write the method submit to workflow and in that method you have to
Now i will show you our newly created workflow on the client side which we can configure and use.
As I have created my workflow for the procurement and sourcing model.
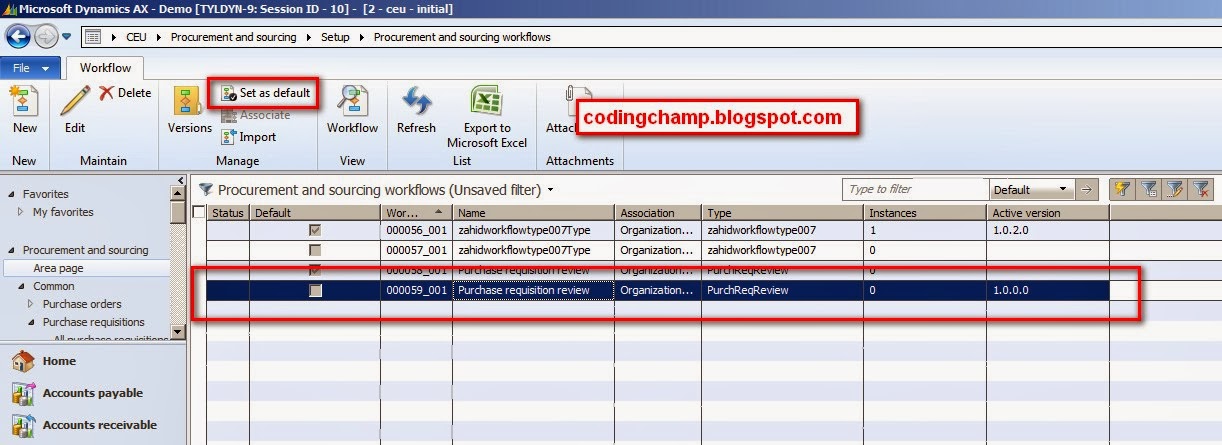
I just go to the CEU/Procurement and sourcing/Setup/Procurement and sourcing workflows.
And than create new workflow you can see your newly created workflow in it.
You can see this in the below image.


In the above image you can see our newly created workflow.
This was all from my side related to the implementation of the workflows.
In the next post i will show you on how can we use this workflow on client side.
Thanks
Muhammad Zahid