Business Operation Framework:
The Business Operation Framework service is one of the system services exposed by Microsoft Dynamics AX and that adheres to the Windows Communication Foundation (WCF) protocols and standards.Following are the features BOF.
The Business Operation Framework service is one of the system services exposed by Microsoft Dynamics AX and that adheres to the Windows Communication Foundation (WCF) protocols and standards.Following are the features BOF.
- Allows menu-driven execution or batch execution of services.
- Calls services in synchronous or asynchronous mode.
- Automatically creates a customizable UI based on the data contract.
- Encapsulates code to operate on the appropriate tier (prompting on the client tier, and business logic on the server tier).
- You can schedule the batch job by the help for batch execution at the specific intervals.
Previously we uses the RunBase Dialog but its now obsolete and we now uses the Business Operation Framework Service.Its basically the service that runs behind the AX.
Steps For Using the Business Operation Framework:
Below are the some steps that are required for using the Business Operation Framework:
Step 1:
First we will create our contract class in which we will define our parm methods for the variables that are input by the user.
In my scenario I will take two integer from the user and than show the addition of these two numbers on the info box and one more thing I will show the query dialog box to the user and than print the selected values from the query dialog box on the infobox.
First we will create our Data Contract class as you can see in the image below.

In the above code I have added the DataContractAttribute above the contract class that is usefull for the creation of the Contract Class and the second attribute is basically optional in that attribute I am basically adding the group some thing like that.
Now inside the class declaration I have declare the input variables that will be input by the user and use inside the parm methods.
Below are the images of the parm methods inside the contract class.


As you can see the above images are of the parm methods of the Contract Class and that we use for the inputs by the user.
As you can see in the above images that there are some attributes above each method.I will explain one by one about each attribute.
DataMemberAttribute is the attribute that is required before each DataContract method.
SysOperationLabelAttribute(literalStr('First Number')) is basically the attribute that is
use for the label to show first number before the text box.
SysOperationHelpTextAttribute(literalStr('Enter First Number')),This is basically the help text i,e that is shown when we move mouse on the textbox.
SysOperationDisplayOrderAttribute('0'),This show the display order of that attribute.
SysOperationGroupMemberAttribute('Numbers') this shows that this attribute is related to the group 'numbers'.
AifQueryTypeAttribute('_query', queryStr('CustBaseData')) This is the attribute use when we are making the query dialog box.So we need to define which query we are going to use.In my case I am using the CustBaseData Query.
Step 2:
Now after creating the contract class we need to create the Service Class.
Just create the service class as we make our normal class and than create the method in that class and than pass the contract class in the parameters of that method and than attach the attribute i.e "SysEntryPointAttribute" on the method.Basically this method is use to operate the user input.
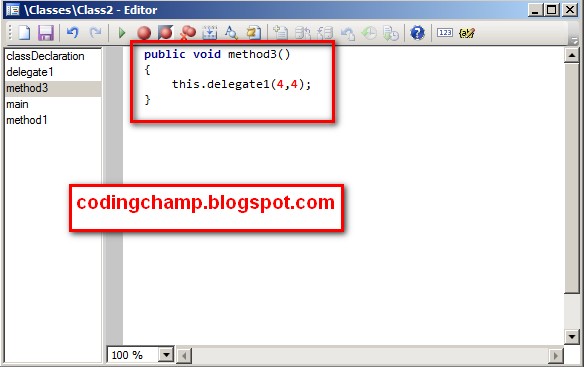
Now you can see the code in the image below of that operation method of service class.

As you can see in the above image that what i am doing in the operation method.I am just adding the two numbers that are input by the user and than printing them on the infolog and one more thing I am getting the values from query dialog box and than printing them on the infolog.
Note:we need to add the [SysEntryPointAttribute] on the top of the method of the service class.
Step 3:
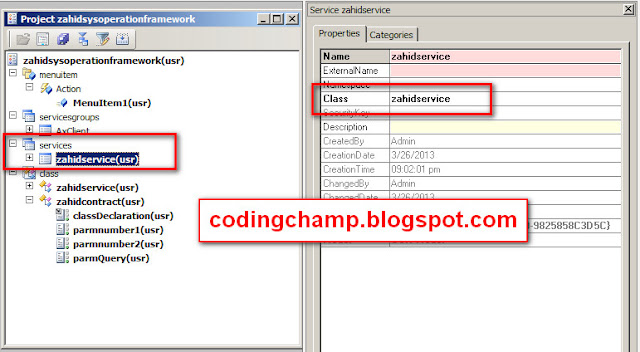
Now in the step 3 we need to create our service.
Just go to the Service node inside the AOT and than create new service by right click than select new service and than in the property of that newly created service just set the name of the service class that we have created early in the step 2.
As you can see in the image below.
Step 4:
Now in the step 4 we need to create the service group.
Now go into the Aot->Servicegroups -> Axclient and than right click and than select new service node reference and than in the property of that newly created service group set the name of the service that we created in step 3.
As you can see in th below image.

Now right click that zahidservicegroup and than right click and than select the deploy to deploy that service group.
Step 5:
Now in the final step we need to create the menuitem.
Just Create the action type menuitem and than in the property sheet of that menu item set the object type = class and than object = "SysOperationServiceController"
Parameters = "zahidservice.startoperation"
As you can see in the below image.

Basically sysoperationservicecontroller is the framework class that builds the UI on the basis of our contract class.
Note: you can create your own UI builder by extending your UI builder class from the sysoperationservicecontroller class.
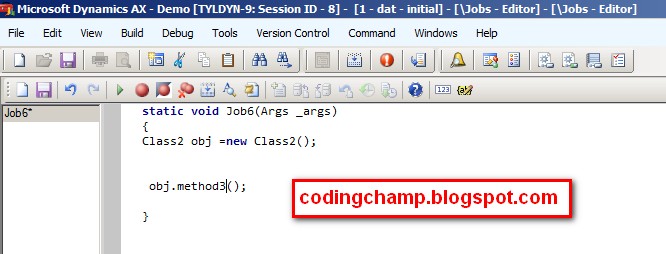
Now I will run the menu item and than show you the output.

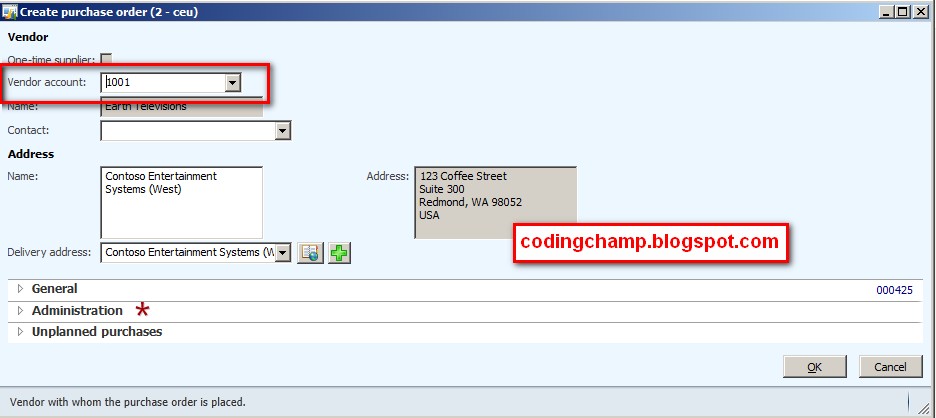
Now i will click the select button of the query dialog box and than select the values of the queries.
You can see that in the image below.

Now when I press the ok button the two values will be selected as you can see in the image below
Note: I am using the CustBaseData Query in the query dialog box.

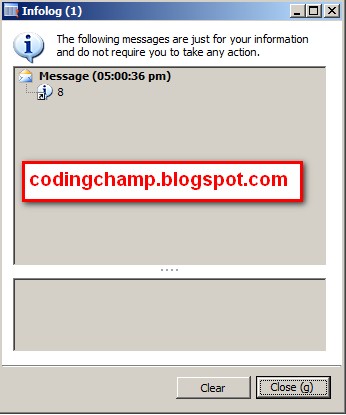
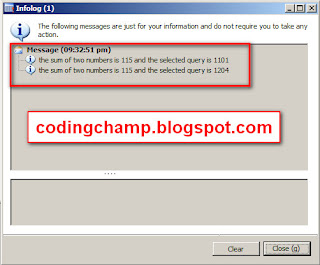
Now when I press the ok button the sum of two numbers and the query will be printed in the info box.
as you can see in the image below.
This was all from my side related to the business operation framework.In the next post I will cover the Advanced topics of the Business Operation Framework.
I hope you like that post.If you have any questions than feel free to ask
Thanks
Muhammad Zahid.
In my scenario I will take two integer from the user and than show the addition of these two numbers on the info box and one more thing I will show the query dialog box to the user and than print the selected values from the query dialog box on the infobox.
First we will create our Data Contract class as you can see in the image below.

In the above code I have added the DataContractAttribute above the contract class that is usefull for the creation of the Contract Class and the second attribute is basically optional in that attribute I am basically adding the group some thing like that.
Now inside the class declaration I have declare the input variables that will be input by the user and use inside the parm methods.
Below are the images of the parm methods inside the contract class.


As you can see the above images are of the parm methods of the Contract Class and that we use for the inputs by the user.
As you can see in the above images that there are some attributes above each method.I will explain one by one about each attribute.
DataMemberAttribute is the attribute that is required before each DataContract method.
SysOperationLabelAttribute(literalStr('First Number')) is basically the attribute that is
use for the label to show first number before the text box.
SysOperationHelpTextAttribute(literalStr('Enter First Number')),This is basically the help text i,e that is shown when we move mouse on the textbox.
SysOperationDisplayOrderAttribute('0'),This show the display order of that attribute.
SysOperationGroupMemberAttribute('Numbers') this shows that this attribute is related to the group 'numbers'.
AifQueryTypeAttribute('_query', queryStr('CustBaseData')) This is the attribute use when we are making the query dialog box.So we need to define which query we are going to use.In my case I am using the CustBaseData Query.
Step 2:
Now after creating the contract class we need to create the Service Class.
Just create the service class as we make our normal class and than create the method in that class and than pass the contract class in the parameters of that method and than attach the attribute i.e "SysEntryPointAttribute" on the method.Basically this method is use to operate the user input.
Now you can see the code in the image below of that operation method of service class.

As you can see in the above image that what i am doing in the operation method.I am just adding the two numbers that are input by the user and than printing them on the infolog and one more thing I am getting the values from query dialog box and than printing them on the infolog.
Note:we need to add the [SysEntryPointAttribute] on the top of the method of the service class.
Step 3:
Now in the step 3 we need to create our service.
Just go to the Service node inside the AOT and than create new service by right click than select new service and than in the property of that newly created service just set the name of the service class that we have created early in the step 2.
As you can see in the image below.

Step 4:
Now in the step 4 we need to create the service group.
Now go into the Aot->Servicegroups -> Axclient and than right click and than select new service node reference and than in the property of that newly created service group set the name of the service that we created in step 3.
As you can see in th below image.

Now right click that zahidservicegroup and than right click and than select the deploy to deploy that service group.
Step 5:
Now in the final step we need to create the menuitem.
Just Create the action type menuitem and than in the property sheet of that menu item set the object type = class and than object = "SysOperationServiceController"
Parameters = "zahidservice.startoperation"
As you can see in the below image.

Basically sysoperationservicecontroller is the framework class that builds the UI on the basis of our contract class.
Note: you can create your own UI builder by extending your UI builder class from the sysoperationservicecontroller class.
Now I will run the menu item and than show you the output.

Now i will click the select button of the query dialog box and than select the values of the queries.
You can see that in the image below.

Now when I press the ok button the two values will be selected as you can see in the image below
Note: I am using the CustBaseData Query in the query dialog box.

Now when I press the ok button the sum of two numbers and the query will be printed in the info box.
as you can see in the image below.

This was all from my side related to the business operation framework.In the next post I will cover the Advanced topics of the Business Operation Framework.
I hope you like that post.If you have any questions than feel free to ask
Thanks
Muhammad Zahid.